Lab-2-11
(2.5% of the course mark)
React Fullstack Lab
- Build and deploy a fullstack JavaScript application using React and Node.js / Express. This lab covers REST API design, client-server communication, CRUD operations, and frontend integration, giving you practical experience with the tools used in real-world web development.
Lab objectives
-
Set up a Node.js / Express server and define RESTful API routes.
-
Connect a React frontend to a backend API using fetch.
-
Implement full CRUD operations (Create, Read, Update, Delete) across the stack.
-
Manage application state in React using hooks (useState, useEffect).
-
Handle asynchronous data fetching and display loading / error states in the UI.
-
Structure a fullstack project with a clean separation between client and server.
-
Test API endpoints and understand HTTP methods (GET, POST, PUT, DELETE).
Create an Express.js app
-
Open VSCode and create a folder named Crud-Backend-App.
-
Open the terminal and change the directory to Crud-Backend-App.
-
Initialize the app by running the following command:
npm init -y
- Install Express.js by running the following command:
npm install express
- Create a file named index.js and add the following code:
// Developer:
// Purpose:

const express = require("express");
const app = express();
const port = 3000;
const APP_NAME = "Express-App";

app.get("/", (req, res) => {
  res.send("Hello World");
});

app.listen(port, () => {
  console.log(`${APP_NAME} listening on port ${port}`);
});
-
Save the changes.
-
In the terminal, run the following command:
node index.js
-
Open your browser and navigate to: http://localhost:3000 and confirm that there is a text output.
-
Press
ctrl-cto terminate the app.
Ensure that the express app is working properly before continuing to the next step.
Add nodemon
- Install nodemon by running the following command:
npm install -D nodemon
- Configure package.json file by adding a new entry to scripts property.
"start": "nodemon index.js"
- In the terminal, run the following command:
npm run start
- Confirm that the terminal output is similar the following image:
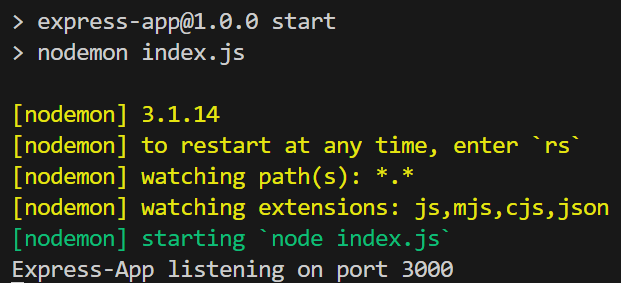
Nodemon restarts your app automatically when it detects file changes, which removes the need to manually stop and restart the server during development.
- Press
ctrl-cto terminate the app.
Add cors
- Install cors by running the following command:
npm install cors
-
CORS (Cross-Origin Resource Sharing) is a browser security mechanism that controls which domains can make requests to your server. By default, browsers block requests from a different origin (domain, port, or protocol). For example, frontend.com trying to fetch data from api.backend.com gets blocked.
-
The cors npm package simplifies Cross-Origin Resource Sharing configuration. It eliminates boilerplate, reduces misconfiguration bugs, and makes CORS policy easy to read and maintain.
Add uuid
- Install uuid by running the following command:
npm install uuid
- The uuid package is going to be used to generate a unique UUID. This UUID will be used to uniquely identify items for the backend.
Add dotenv
- Install dotenv by running the following command:
npm install dotenv
- The dotenv package loads environment variables from a .env file into process.env. This allows the developer to avoid hardcoding values in their code.
- Inside the Crud-Backend-App folder, create a file named .env and add the following code:
PORT=3001
APP_NAME=Crud-Backend-App
Add lib
-
Inside the Crud-Backend-App folder, create a folder named lib.
-
Inside the Crud-Backend-App folder, update package.json and add the following:
"type": "module"
- Inside the lib folder, create a file named Crud.js and add the following code:
// Developer:
// Purpose:

import { generateUUID } from "./UUIDUtilsES6.js";

// Create any object you wish
let items = [];

function createItem(item) {
  // Generate a unique id for the list
  item.id = generateUUID(4);
  items.push(item);

  return item;
}

function readItems(id = "") {
  // Default behavior is to return the whole list
  if (id === "") {
    return items;
  }

  // If there is an id, try to match it with the list
  const item = items.filter((item) => {
    return item.id === id;
  });

  // This is to not allow the following:
  // 0 items
  // More that one item
  if (item.length != 1) {
    return {};
  }

  // Only return 1 item
  return item[0];
}

function updateItem(id, itemParam) {
  // Look for a match using find
  let itemToUpdate = items.find((item) => {
    return item.id === id;
  });

  // Update if it exists and create if it does not
  if (itemToUpdate?.id) {
    const keys = Object.keys(itemParam);

    // This is to ensure that we only update when the values have changed
    keys.forEach((key) => {
      if (itemToUpdate[key] != itemParam[key]) {
        itemToUpdate[key] = itemParam[key];
      }
    });

    return itemToUpdate;
  } else {
    // This means that the item does not exist so we will create it as per PUT definition
    return createItem(itemParam);
  }
}

function deleteItem(id) {
  // Overwrite array to simulate deletion
  // No need to check for the id, if it does not exist nothing happens
  items = items.filter((item) => {
    return item.id !== id;
  });

  return {};
}

// ES6 export syntax
export { createItem, readItems, updateItem, deleteItem };
- Inside the lib folder, create a file named UUIDUtilsES6.js and add the following code:
// Developer:
// Purpose:

import { v1, v4 } from "uuid";

function generateUUID(version) {
  // Make sure that the parameter is a number
  if (!Number.isFinite(version)) {
    return "";
  }

  // Return the correct version based on the value
  if (version === 1) {
    return v1();
  }

  if (version === 4) {
    return v4();
  }
}

// ES6 export syntax
export { generateUUID };
Add middlewares / routes
- Update index.js and add the following code:
// Developer:
// Purpose:

// ES6 Syntax for importing
import { createItem, readItems, updateItem, deleteItem } from "./lib/Crud.js";
// CORS (Cross-Origin Resource Sharing) is a browser security mechanism that blocks requests
// from one domain to another. Unless the server explicitly allows it via response headers
import cors from "cors";
import express from "express";
const app = express();

// Load .env file
import "dotenv/config";

// Use the .env file to set the following
const PORT = parseInt(process.env.PORT);
const APP_NAME = process.env.APP_NAME;

// Custom middleware to show request / response logging
app.use(customMiddleware);

// Allow CORS for testing
app.use(cors());

// It's a built-in Express middleware that parses incoming
// JSON request bodies and makes the data available on req.body
app.use(express.json());

// Parses incoming HTTP request bodies with
// URL-encoded form data (key1=value1&key2=value2), making it accessible via req.body.
// The extended: true option allows nested objects using the qs library instead of the basic querystring parser.
app.use(express.urlencoded({ extended: true }));

// Create route
app.post("/create", (req, res) => {
  res.send(createItem(req.body));
});

// Read all route
app.get("/read", (req, res) => {
  res.send(readItems());
});

// Read one route
app.get("/read/:id", (req, res) => {
  const { id } = req.params;
  res.send(readItems(id));
});

// Update route
app.put("/update/:id", (req, res) => {
  const { id } = req.params;
  res.send(updateItem(id, req.body));
});

// Delete route
app.delete("/delete/:id", (req, res) => {
  const { id } = req.params;
  res.send(deleteItem(id));
});

// To handle routes that does exist
app.all("*catchAll", (req, res) => {
  res.status(401).send({
    message: `Method: ${req.method} Url: ${req.url} not found.`,
  });
});

app.listen(PORT, () => {
  console.log(`${APP_NAME} listening on PORT ${PORT}`);
});

function customMiddleware(req, res, next) {
  console.log(
    `[Type: Request] [Url: ${req.url}] [Method: ${req.method}] [User Agent: ${req.headers["user-agent"]}]`
  );

  // Listener which fires when the response is actually sent
  res.on("finish", () => {
    console.log(
      `[Type: Response] [Status Code: ${res.statusCode}] [Status Message: ${res.statusMessage}]`
    );
  });

  // Pass control to the next middleware
  next();
}
- In the terminal, run the following command:
npm run start
Crud-Backend-App Endpoints
| Rest Endpoint | HTTP Method | Purpose |
|---|---|---|
| /create | POST | Create an item |
| /read | GET | Read all items |
| /read/:id | GET | Read an item |
| /update/:id | PUT | Update an item |
| /delete/:id | DELETE | Delete an item |
Test create
-
Open Postman, click File > New... > HTTP.
-
Set the HTTP method to POST and the URL to http://localhost:3001/create.
-
Select Body, then raw, and then JSON.
-
Set the Body to:
{
    "firstName": "Bill",
    "lastName": "Gates"
}
-
Click on Send. Take a screenshot and save it as post.png.
-
Take note of the id, as it will be used in subsequent requests.
Test read
-
Open Postman, click File > New... > HTTP.
-
Set the HTTP method to GET and the URL to http://localhost:3001/read.
-
Click on Send. Take a screenshot and save it as get-all.png.
-
Set the HTTP method to GET and the URL to http://localhost:3001/read/id, where id is the id of the previously created item.
-
Click on Send. Take a screenshot and save it as get-one.png.
Test update
-
Open Postman, click File > New... > HTTP.
-
Set the HTTP method to PUT and the URL to http://localhost:3001/update/id, where id is the id of the previously created item.
-
Select Body, then raw, and then JSON.
-
Set the Body to:
{
    "firstName": "Elon",
    "lastName": "Musk"
}
- Click on Send. Take a screenshot and save it as put.png.
Test delete
-
Open Postman, click File > New... > HTTP.
-
Set the HTTP method to DELETE and the URL to http://localhost:3001/delete/id, where id is the id of the previously created item.
-
Click on Send. Take a screenshot and save it as delete.png.
Create basic React app
- On VSCode, open the terminal and enter the following command:
npm create vite@latest react-fullstack-app -- --template react
- Clean up the project by doing the following:
- In the src folder, update main.jsx and remove the following code:
import "./index.css";
- In the src folder, update App.jsx and overwrite the contents by copying the following code:
// Developer:
// Purpose:

function App() {
  return <h1>First React App</h1>;
}

export default App;
-
Delete the following:
-
Folder:
- src/assets
-
File:
-
src/App.css
-
src/index.css
-
-
- Open your browser and navigate to: http://localhost:5173, changes should be displayed immediately.
-
Ensure that you are able to see the latest changes in the browser after the project clean up.
-
Do not not proceed to the next step until you have verified that the project is still working.
Add Lucide React
- In the terminal, install Lucide React by running the following command:
npm install lucide-react
Add Tailwind
- In the terminal, install Tailwind and Vite plugin by running the following command:
npm install -D tailwindcss @tailwindcss/vite
- In the root of the app, update vite.config.js and add the following code:
import { defineConfig } from "vite";
import react from "@vitejs/plugin-react";
import tailwindcss from "@tailwindcss/vite";

export default defineConfig({
  plugins: [react(), tailwindcss()],
});
- In the src folder, create a file named: style.css and add the following code:
@import "tailwindcss";
- In the src folder, update main.jsx with the following css import statements:
import "./style.css";
Ensure this file has no other CSS imports besides the one above, as doing so may cause inconsistencies in the output.
Create components
-
Inside the src folder, create a folder named: components.
-
Inside the components folder, create a file named: Fullstack.jsx and add the following code:
// Developer:
// Purpose:

// React hooks
import { useEffect, useState } from "react";

// Use the following Lucide React icons
import { Pen, SendHorizontal, Trash2, UserRound, Users } from "lucide-react";

// Url of the backend
const URL = "http://localhost:3001";

// Table header definition
const tableHeaders = ["Actions", "Id", "First Name", "Last Name"];

function Fullstack() {
  // State to keep track of the current item
  const [itemId, setItemId] = useState("");

  // Form input states
  const [firstName, setFirstName] = useState("");
  const [lastName, setLastName] = useState("");

  // State to either handle Create (POST) or Update (PUT)
  const [formMode, setFormMode] = useState("Create");

  // State to determine if the data needs to be re-downloaded
  const [downloadData, setdownloadData] = useState(false);

  // State to handle the data from the server
  const [tableDatas, setTableDatas] = useState([]);

  // useEffect - A React hook that runs side effects like API calls or DOM updates after render
  useEffect(() => {
    (async () => {
      try {
        const response = await fetch(`${URL}/read`);
        const data = await response.json();

        if (data) {
          setTableDatas(data);
        }
      } catch (error) {
        alert("An error has occurred. Please see the browser console.");
      }
    })();
  }, [downloadData]);
  // downloadData is added as a dependency array.
  // This means when it's value changes it will re-execute the code inside the hook

  // Handles form input changes
  const changeHandler = (event) => {
    const { id, value } = event.target;

    // Update the correct state variable based on the input id
    if (id === "firstName") {
      setFirstName(value);
    } else if (id === "lastName") {
      setLastName(value);
    }
  };

  // Handles the form submission
  const submitHandler = (event) => {
    // Prevent the form from being submitted
    event.preventDefault();

    (async () => {
      let message = `Failed to ${formMode.toLowerCase()} item.`;

      try {
        // Use fetch to submit the form to the server
        // This is re-used to either handle POST or PUT request
        const response = await fetch(
          `${URL}/${formMode.toLowerCase()}${
            formMode.toLowerCase() === "update" ? `/${itemId}` : ""
          }`,
          {
            method: `${formMode.toLowerCase() === "create" ? "POST" : "PUT"}`,
            headers: {
              "Content-Type": "application/json",
            },

            body: JSON.stringify({
              firstName: firstName,
              lastName: lastName,
            }),
          }
        );

        const data = await response.json();

        if (data?.id) {
          // Reset the form input values
          setFirstName("");
          setLastName("");

          // Force the data to be re-downloaded, to refresh the list
          setdownloadData(!downloadData);
          message = `Item ${formMode.toLowerCase()}d successfully.`;
          setFormMode("Create");
        }
      } catch (error) {
        message = "An error has occurred. Please see the browser console.";
      } finally {
        alert(message);
      }
    })();
  };

  const deleteHandler = (id) => {
    (async () => {
      let message = `Failed to delete item.`;

      try {
        // Fetch call to perform a DELETE request
        const response = await fetch(`${URL}/delete/${id}`, {
          method: "DELETE",
        });

        if (response.status === 200) {
          // Force the data to be re-downloaded, to refresh the list
          setdownloadData(!downloadData);
          message = `Item deleted successfully.`;
        }
      } catch (error) {
        message = "An error has occurred. Please see the browser console.";
      } finally {
        alert(message);
      }
    })();
  };

  const updateHandler = (id) => {
    (async () => {
      try {
        // Fetch call to perform a GET request
        const response = await fetch(`${URL}/read/${id}`);
        const data = await response.json();

        if (data?.id && data?.firstName && data?.lastName) {
          // Update the following state variables
          setItemId(data?.id);
          setFirstName(data?.firstName);
          setLastName(data?.lastName);
          setFormMode("Update");
        } else {
          alert(`Failed to fetch an item.`);
        }
      } catch (error) {
        alert("An error has occurred. Please see the browser console.");
      }
    })();
  };

  return (
    <div className="p-4 m-4">
      <div className="max-w-md mx-auto bg-white border border-gray-200 rounded-xl p-6">
        <h2 className="text-lg font-medium mb-6 flex items-center justify-center gap-2">
          <UserRound className="w-5 h-5" />
          New User
        </h2>
        <form onSubmit={submitHandler}>
          <div className="flex flex-col gap-4">
            <div className="flex flex-col gap-1.5">
              <label className="text-sm text-gray-500">First name</label>
              <input
                type="text"
                name="firstName"
                id="firstName"
                value={firstName}
                onChange={changeHandler}
                placeholder="Enter your first name"
                className="border border-gray-200 rounded-lg px-3 py-2 text-sm focus:outline-none focus:ring-2 focus:ring-blue-500"
              />
            </div>
            <div className="flex flex-col gap-1.5">
              <label className="text-sm text-gray-500">Last name</label>
              <input
                type="text"
                name="lastName"
                id="lastName"
                value={lastName}
                onChange={changeHandler}
                placeholder="Enter your last name"
                className="border border-gray-200 rounded-lg px-3 py-2 text-sm focus:outline-none focus:ring-2 focus:ring-blue-500"
              />
            </div>

            <div className="flex items-center">
              <button
                disabled={
                  firstName.length > 0 && lastName.length > 0 ? false : true
                }
                className="w-full flex items-center justify-center gap-2 px-4 py-2 bg-blue-600 text-white rounded-lg font-medium text-sm hover:scale-105 transition cursor-pointer disabled:opacity-50 disabled:cursor-not-allowed disabled:hover:scale-100"
              >
                <SendHorizontal className="w-4 h-4" />
                {formMode} User
              </button>
            </div>
          </div>
        </form>
      </div>

      <div className="max-w pt-4 mx-auto">
        <h2 className="text-lg font-medium mb-6 flex items-center justify-center gap-2">
          <Users className="w-5 h-5" />
          {tableDatas.length} user{tableDatas.length > 1 ? "s" : null}
        </h2>
        <table className="w-full text-sm border border-gray-200 rounded-lg overflow-hidden">
          <thead className="bg-gray-50 text-gray-500 text-left">
            <tr>
              {tableHeaders.map((tableHeader, index) => (
                <th key={index} className="px-4 py-3 font-medium text-center">
                  {tableHeader}
                </th>
              ))}
            </tr>
          </thead>
          <tbody className="divide-y divide-gray-200">
            {tableDatas.map((tableData, index) => (
              <tr key={index} className="hover:bg-gray-50">
                <td className="px-4 py-3">
                  <div className="flex items-center justify-center gap-2">
                    <button
                      onClick={() => updateHandler(tableData.id)}
                      className="flex items-center gap-2 px-4 py-2 bg-gray-600 text-white rounded-lg text-sm font-medium hover:scale-110 with transition cursor-pointer"
                    >
                      <Pen className="w-4 h-4" />
                      Update
                    </button>

                    <button
                      onClick={() => deleteHandler(tableData.id)}
                      className="flex items-center gap-2 px-4 py-2 bg-red-600 text-white rounded-lg text-sm font-medium hover:scale-110 with transition cursor-pointer"
                    >
                      <Trash2 className="w-4 h-4" />
                      Delete
                    </button>
                  </div>
                </td>
                <td className="px-4 py-3">{tableData.id}</td>
                <td className="px-4 py-3">{tableData.firstName}</td>
                <td className="px-4 py-3">{tableData.lastName}</td>
              </tr>
            ))}
          </tbody>
        </table>
      </div>
    </div>
  );
}

export default Fullstack;
- Inside the src folder, update App.jsx and add the following code:
import Fullstack from "./components/Fullstack";

function App() {
  return <Fullstack />;
}

export default App;
- Ensure that Crud-Backend-App is running. Do not proceed until the application is running.
- In the terminal, run the following command:
npm run dev
- Open your browser and navigate to http://localhost:5173. You should see a form where you can enter a first name and last name. You should also be able to edit and delete records. Feel free to test it. Take a screenshot and save it react.png.
Submission
-
Create a folder named submit.
-
Copy all the screenshots (post.png, get-all.png, get-one.png, put.png, delete.png, and react.png) to the submit folder.
-
Create a zip file of the submit folder.
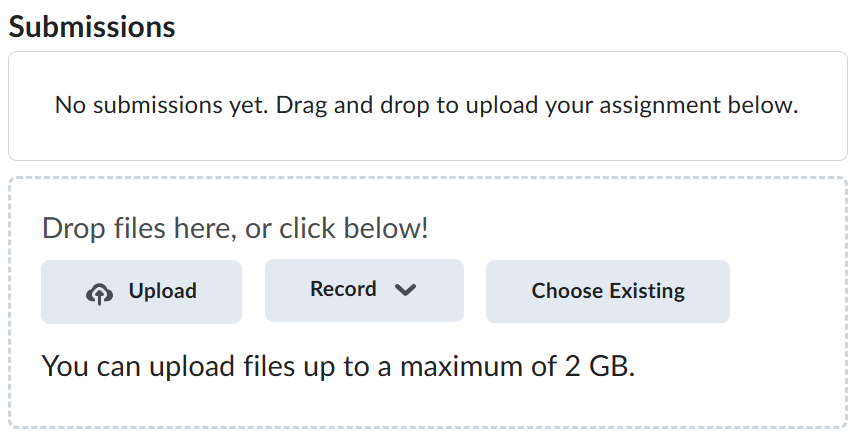
-
Navigate back to where the lab was originally downloaded, there should be a Submissions section (see below) where the zip file can be uploaded.