Lab-1-4
(2.5% of the course mark)
Express.js Static Lab
- A hands-on workshop focusing on utilizing Express.js framework to efficiently serve static files such as HTML, CSS, and JavaScript. Participants learn to leverage Express's built-in middleware for static file serving, explore best practices for organizing static assets, and gain practical insights into optimizing performance for web applications. This lab also introduces the following CSS frameworks: Bootstrap, Bulma, and Tailwind.
Lab objectives
-
Mastering the implementation of Express middleware for static file serving.
-
Understanding best practices for organizing and managing static assets within Express.js projects.
-
Optimizing performance strategies for web applications through hands-on exercises and real-world examples.
-
Introduce students on how to setup and use the following CSS frameworks: Bootstrap, Bulma, and Tailwind.
Create an Express.js app
-
Open VSCode and create a folder named Express-Static-App.
-
Open the terminal and change the directory to Express-Static-App.
-
Initialize the app by running the following command:
npm init -y
- Install Express.js by running the following command:
npm install express
- Create a file named index.js and add the following code:
// Developer:
// Purpose:

const express = require("express");
const app = express();
const port = 3000;
const APP_NAME = "Express-Static-App";

app.use(express.static("public"));

app.get("/", (req, res) => {
  res.sendFile(`${__dirname}/public/index.html`);
});

app.listen(port, () => {
  console.log(`${APP_NAME} listening on port ${port}`);
});
app.use(express.static("public"));
express.static("public") - Is the middleware responsible for serving static files. It uses public as the folder where the other folders and files are located.
- Save the changes.
Add nodemon
- Install nodemon by running the following command:
npm install -D nodemon
- Configure the package.json file by adding a new entry to the scripts property:
"start": "nodemon index.js"
- In the terminal, run the following command:
npm run start
- Confirm that the terminal output is similar the following image:
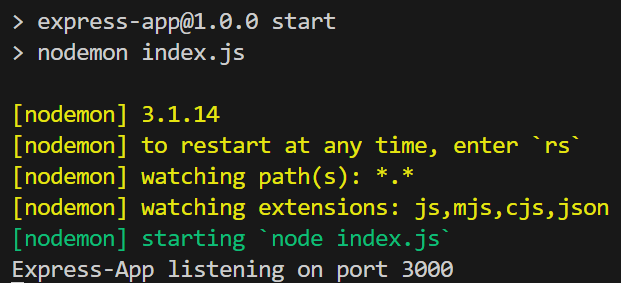
Nodemon restarts your app automatically when it detects file changes, which removes the need to manually stop and restart the server during development.
Add static files
- Create the following folders:
Express-Static-App/public
Express-Static-App/public/css
Express-Static-App/public/images
Express-Static-App/public/js
-
Inside the public folder, create a file named: index.html and create an HTML app that satisfies the following conditions:
-
The HTML app must use a css file and place it inside Express-Static-App/public/css.
-
The HTML app must use an image file and place it inside Express-Static-App/public/images.
-
The HTML app must use a js file and place it inside Express-Static-App/public/js.
-
-
Save the changes.
-
Open your browser and navigate to: http://localhost:3000 It should display the HTML file that was saved inside the public folder. Take a screenshot and save it as public.png.
Add css frameworks route
- Update index.js and add a new route with the following code:
app.get("/css-frameworks", (req, res) => {
  res.sendFile(`${__dirname}/public/css-frameworks/index.html`);
});
-
Inside the folder: Express-Static-App/public, create a folder named: css-frameworks.
-
Inside the folder: Express-Static-App/public/css, create a file named: normalize.css and add the following code:
button,
hr,
input {
  overflow: visible;
}
progress,
sub,
sup {
  vertical-align: initial;
}
[type="checkbox"],
[type="radio"],
legend {
  box-sizing: border-box;
  padding: 0;
}
html {
  line-height: 1.15;
  -webkit-text-size-adjust: 100%;
}
body {
  margin: 0;
}
details,
main {
  display: block;
}
h1 {
  font-size: 2em;
  margin: 0.67em 0;
}
hr {
  box-sizing: initial;
  height: 0;
}
code,
kbd,
pre,
samp {
  font-family: monospace, monospace;
  font-size: 1em;
}
a {
  background-color: initial;
}
abbr[title] {
  border-bottom: none;
  text-decoration: underline;
  text-decoration: underline dotted;
}
b,
strong {
  font-weight: bolder;
}
small {
  font-size: 80%;
}
sub,
sup {
  font-size: 75%;
  line-height: 0;
  position: relative;
}
sub {
  bottom: -0.25em;
}
sup {
  top: -0.5em;
}
img {
  border-style: none;
}
button,
input,
optgroup,
select,
textarea {
  font-family: inherit;
  font-size: 100%;
  line-height: 1.15;
  margin: 0;
}
button,
select {
  text-transform: none;
}
[type="button"],
[type="reset"],
[type="submit"],
button {
  -webkit-appearance: button;
}
[type="button"]::-moz-focus-inner,
[type="reset"]::-moz-focus-inner,
[type="submit"]::-moz-focus-inner,
button::-moz-focus-inner {
  border-style: none;
  padding: 0;
}
[type="button"]:-moz-focusring,
[type="reset"]:-moz-focusring,
[type="submit"]:-moz-focusring,
button:-moz-focusring {
  outline: ButtonText dotted 1px;
}
fieldset {
  padding: 0.35em 0.75em 0.625em;
}
legend {
  color: inherit;
  display: table;
  max-width: 100%;
  white-space: normal;
}
textarea {
  overflow: auto;
}
[type="number"]::-webkit-inner-spin-button,
[type="number"]::-webkit-outer-spin-button {
  height: auto;
}
[type="search"] {
  -webkit-appearance: textfield;
  outline-offset: -2px;
}
[type="search"]::-webkit-search-decoration {
  -webkit-appearance: none;
}
::-webkit-file-upload-button {
  -webkit-appearance: button;
  font: inherit;
}
summary {
  display: list-item;
}
[hidden],
template {
  display: none;
}
- Inside the folder: Express-Static-App/public/css, create a file named: sakura.css and add the following code:
h1,
h2,
h3,
h4,
h5,
h6,
html {
  font-family: -apple-system, BlinkMacSystemFont, Segoe UI, Roboto, Helvetica
      Neue, Arial, Noto Sans, sans-serif;
}
img,
p,
pre,
ul,
video {
  margin-top: 0;
  margin-bottom: 2.5rem;
}
blockquote,
img,
p,
pre,
ul,
video {
  margin-bottom: 2.5rem;
}
table,
textarea {
  width: 100%;
}
html {
  font-size: 62.5%;
}
body {
  background-color: #f9f9f9;
  color: #4a4a4a;
  font-size: 1.8rem;
  line-height: 1.618;
  margin: auto;
  max-width: 38em;
  padding: 13px;
}
h1,
h2,
h3,
h4,
h5,
h6 {
  font-weight: 700;
  line-height: 1.1;
  margin-bottom: 1.5rem;
  margin-top: 3rem;
  overflow-wrap: break-word;
  word-wrap: break-word;
  -ms-word-break: break-all;
  word-break: break-word;
}
h1 {
  font-size: 2.35em;
}
h2 {
  font-size: 2em;
}
h3 {
  font-size: 1.75em;
}
h4 {
  font-size: 1.5em;
}
h5 {
  font-size: 1.25em;
}
h6,
pre > code {
  font-size: 1em;
}
small,
sub,
sup {
  font-size: 75%;
}
hr {
  border-color: #1d7484;
}
a {
  color: #1d7484;
  text-decoration: none;
}
a:visited {
  color: #144f5a;
}
a:hover {
  border-bottom: 2px solid #4a4a4a;
  color: #982c61;
}
ul {
  padding-left: 1.4em;
}
li {
  margin-bottom: 0.4em;
}
blockquote {
  background-color: #f1f1f1;
  border-left: 5px solid #1d7484;
  margin-left: 0;
  margin-right: 0;
  padding: 0.8em 0.8em 0.8em 1em;
}
blockquote p {
  margin-bottom: 0;
}
img,
video {
  height: auto;
  max-width: 100%;
}
pre {
  display: block;
  overflow-x: auto;
  padding: 1em;
}
code,
kbd,
pre,
samp {
  background-color: #f1f1f1;
  font-size: 0.9em;
}
code,
kbd,
samp {
  padding: 0 0.5em;
  white-space: pre-wrap;
}
pre > code {
  background-color: initial;
  padding: 0;
  white-space: pre;
}
table {
  border-collapse: collapse;
  margin-bottom: 2rem;
  text-align: justify;
}
td,
th {
  border-bottom: 1px solid #f1f1f1;
  padding: 0.5em;
}
.button,
button,
input[type="button"],
input[type="file"]::file-selector-button,
input[type="reset"],
input[type="submit"] {
  background-color: #1d7484;
  border: 1px solid #1d7484;
  border-radius: 1px;
  box-sizing: border-box;
  color: #f9f9f9;
  cursor: pointer;
  display: inline-block;
  padding: 5px 10px;
  text-align: center;
  text-decoration: none;
  white-space: nowrap;
}
.button[disabled],
button[disabled],
input[type="button"][disabled],
input[type="file"]::file-selector-button[disabled],
input[type="reset"][disabled],
input[type="submit"][disabled] {
  cursor: default;
  opacity: 0.5;
}
.button:hover,
button:hover,
input[type="button"]:hover,
input[type="file"]::file-selector-button:hover,
input[type="reset"]:hover,
input[type="submit"]:hover {
  background-color: #982c61;
  color: #f9f9f9;
  outline: 0;
}
.button:focus-visible,
button:focus-visible,
input[type="button"]:focus-visible,
input[type="file"]::file-selector-button:focus-visible,
input[type="reset"]:focus-visible,
input[type="submit"]:focus-visible {
  outline-style: solid;
  outline-width: 2px;
}
input,
select,
textarea {
  background-color: #f1f1f1;
  border: 1px solid #f1f1f1;
  border-radius: 4px;
  box-shadow: none;
  box-sizing: border-box;
  color: #4a4a4a;
  margin-bottom: 10px;
  padding: 6px 10px;
}
input:focus,
select:focus,
textarea:focus {
  border: 1px solid #1d7484;
  outline: 0;
}
input[type="checkbox"]:focus {
  outline: #1d7484 dotted 1px;
}
fieldset,
label,
legend {
  display: block;
  font-weight: 600;
  margin-bottom: 0.5rem;
}
@media (max-width: 684px) {
  body {
    font-size: 1.53rem;
  }
}
@media (max-width: 382px) {
  body {
    font-size: 1.35rem;
  }
}
- Inside the folder: Express-Static-App/public/css-frameworks, create a file named: index.html and add the following code:
<!--
Developer:
Purpose:
-->

<!DOCTYPE html>
<html>
  <head>
    <meta charset="utf-8" />
    <meta name="viewport" content="width=device-width, initial-scale=1" />
    <title>CSS Frameworks</title>
    <link rel="stylesheet" href="../css/normalize.css" />
    <link rel="stylesheet" href="../css/sakura.css" />
  </head>

  <body>
    <h1>CSS Frameworks</h1>

    <section>
      <h2><a href="bootstrap.html">Bootstrap</a></h2>
    </section>

    <section>
      <h2><a href="bulma.html">Bulma</a></h2>
    </section>

    <section>
      <h2><a href="tailwind.html">Tailwind</a></h2>
    </section>
  </body>
</html>
-
Save the changes.
-
Open your browser and navigate to: http://localhost:3000/css-frameworks It should display the HTML file that was saved inside the public/css-frameworks folder. Take a screenshot and save it as public-css-frameworks.png.
Add Bootstrap
- Inside the folder: Express-Static-App/public/css-frameworks, create a file named: bootstrap.html and copy the following code:
<!DOCTYPE html>
<html lang="en">
  <head>
    <meta charset="utf-8" />
    <meta name="viewport" content="width=device-width, initial-scale=1" />
    <title>Bootstrap Demo</title>
    <link
      href="https://cdn.jsdelivr.net/npm/bootstrap@5.3.8/dist/css/bootstrap.min.css"
      rel="stylesheet"
      integrity="sha384-sRIl4kxILFvY47J16cr9ZwB07vP4J8+LH7qKQnuqkuIAvNWLzeN8tE5YBujZqJLB"
      crossorigin="anonymous"
    />
  </head>
  <body>
    <div class="container">
      <h1>Bootstrap Demo</h1>
      <div class="alert alert-primary" role="alert">alert alert-primary</div>
      <div class="alert alert-secondary" role="alert">
        alert alert-secondary
      </div>
      <div class="alert alert-success" role="alert">alert alert-success</div>
      <div class="alert alert-danger" role="alert">alert alert-danger</div>
      <div class="alert alert-warning" role="alert">alert alert-warning</div>
      <div class="alert alert-info" role="alert">alert alert-info</div>
      <div class="alert alert-light" role="alert">alert alert-light</div>
      <div class="alert alert-dark" role="alert">alert alert-dark</div>
    </div>

    <!-- This is optional -->
    <script
      src="https://cdn.jsdelivr.net/npm/@popperjs/core@2.11.8/dist/umd/popper.min.js"
      integrity="sha384-I7E8VVD/ismYTF4hNIPjVp/Zjvgyol6VFvRkX/vR+Vc4jQkC+hVqc2pM8ODewa9r"
      crossorigin="anonymous"
    ></script>
    <script
      src="https://cdn.jsdelivr.net/npm/bootstrap@5.3.8/dist/js/bootstrap.min.js"
      integrity="sha384-G/EV+4j2dNv+tEPo3++6LCgdCROaejBqfUeNjuKAiuXbjrxilcCdDz6ZAVfHWe1Y"
      crossorigin="anonymous"
    ></script>
  </body>
</html>
-
Save the changes.
-
Open your browser and navigate to: http://localhost:3000/css-frameworks and click on Bootstrap. Take a screenshot and save it as public-css-frameworks-bootstrap.png.
-
Bootstrap has many built-in components. Customise a built-in component of your choice and add the code on a file named: bootstrap-component.html inside the folder: Express-Static-App/public/css-frameworks.
-
Save the changes.
-
Open your browser and navigate to: http://localhost:3000/css-frameworks/bootstrap-component.html. Take a screenshot and save it as public-css-frameworks-bootstrap-component.png.
Add Bulma
- Inside the folder: Express-Static-App/public/css-frameworks, create a file named: bulma.html and add the following code:
<!DOCTYPE html>
<html>
  <head>
    <meta charset="utf-8" />
    <meta name="viewport" content="width=device-width, initial-scale=1" />
    <title>Bulma Demo</title>
    <link
      rel="stylesheet"
      href="https://cdn.jsdelivr.net/npm/bulma@1.0.4/css/bulma.min.css"
    />
  </head>
  <body>
    <section class="section">
      <h1 class="is-size-1">Bulma Demo</h1>
      <div class="container">
        <div class="notification is-primary">notification is-primary</div>
        <div class="notification is-info">notification is-info</div>
        <div class="notification is-success">notification is-success</div>
        <div class="notification is-warning">notification is-warning</div>
        <div class="notification is-danger">notification is-danger</div>
        <div class="notification is-white">notification is-white</div>
        <div class="notification is-black">notification is-black</div>
      </div>
    </section>
  </body>
</html>
-
Save the changes.
-
Open your browser and navigate to: http://localhost:3000/css-frameworks and click on Bulma. Take a screenshot and save it as public-css-frameworks-bulma.png.
-
Bulma has many built-in components. Customise a built-in component of your choice and add the code on a file named: bulma-component.html inside the folder: Express-Static-App/public/css-frameworks.
-
Save the changes.
-
Open your browser and navigate to: http://localhost:3000/css-frameworks/bulma-component.html. Take a screenshot and save it as public-css-frameworks-bulma-component.png.
Add Tailwind
- Inside the folder: Express-Static-App/public/css-frameworks, create a file named: tailwind.html and add the following code:
<!DOCTYPE html>
<html>
  <head>
    <meta charset="UTF-8" />
    <meta name="viewport" content="width=device-width, initial-scale=1.0" />
    <title>Tailwind Demo</title>
    <script src="https://cdn.jsdelivr.net/npm/@tailwindcss/browser@4"></script>
  </head>
  <body>
    <div class="m-4">
      <h1 class="mb-2 text-3xl font-bold">Tailwind Demo</h1>

      <div
        class="mb-2 px-4 py-3 rounded bg-blue-100 border border-blue-300 text-blue-900 text-sm"
      >
        mb-2 px-4 py-3 rounded bg-blue-100 border border-blue-300 text-blue-900
        text-sm
      </div>

      <div
        class="mb-2 px-4 py-3 rounded bg-green-100 border border-green-300 text-green-900 text-sm"
      >
        mb-2 px-4 py-3 rounded bg-green-100 border border-green-300
        text-green-900 text-sm
      </div>

      <div
        class="mb-2 px-4 py-3 rounded bg-yellow-100 border border-yellow-300 text-yellow-900 text-sm"
      >
        mb-2 px-4 py-3 rounded bg-yellow-100 border border-yellow-300
        text-yellow-900 text-sm
      </div>

      <div
        class="mb-2 px-4 py-3 rounded bg-red-100 border border-red-300 text-red-900 text-sm"
      >
        mb-2 px-4 py-3 rounded bg-red-100 border border-red-300 text-red-900
        text-sm
      </div>

      <div
        class="mb-2 px-4 py-3 rounded bg-gray-100 border border-gray-300 text-gray-900 text-sm"
      >
        mb-2 px-4 py-3 rounded bg-gray-100 border border-gray-300 text-gray-900
        text-sm
      </div>

      <div
        class="mb-2 px-4 py-3 rounded bg-indigo-100 border border-indigo-300 text-indigo-900 text-sm"
      >
        mb-2 px-4 py-3 rounded bg-indigo-100 border border-indigo-300
        text-indigo-900 text-sm
      </div>
    </div>
  </body>
</html>
-
Save the changes.
-
Open your browser and navigate to: http://localhost:3000/css-frameworks and click on Tailwind. Take a screenshot and save it as public-css-frameworks-tailwind.png.
-
Tailwind does not have built-in components in a traditional way, however what they have are ui-blocks: https://tailwindcss.com/plus/ui-blocks. Customise a ui-block of your choice and add the code on a file named: tailwind-ui-block.html inside the folder: Express-Static-App/public/css-frameworks.
-
Save the changes.
-
Open your browser and navigate to: http://localhost:3000/css-frameworks/tailwind-ui-blocks.html. Take a screenshot and save it as public-css-frameworks-tailwind-ui-blocks.png.
Using sakura.css and normalize.css
-
Open VSCode and create a folder named app.
-
Download the files sakura.css and normalize.css and save them to the app folder. Make sure to rename them to sakura.css and normalize.css.
-
Copy public.png, public-css-frameworks.png, public-css-frameworks-bootstrap.png, public-css-frameworks-bootstrap-component.png, public-css-frameworks-bulma.png, public-css-frameworks-bulma-component.png, public-css-frameworks-tailwind.png and public-css-frameworks-tailwind-ui-blocks.png to the app folder.
-
In the app folder create a file named: lab-1-4.html and add following the HTML code:
<!--
Developer:
Purpose:
-->

<!DOCTYPE html>
<html>
  <head>
    <meta charset="utf-8" />
    <meta name="viewport" content="width=device-width, initial-scale=1" />
    <!-- Update title -->
    <title></title>
    <!-- Reset styles using normalize -->
    <link rel="stylesheet" href="./normalize.css" />
    <!-- Classless css  -->
    <link rel="stylesheet" href="./sakura.css" />
  </head>
  <body>
    <!-- Enter the HTML codes to display the captured screenshots -->
  </body>
</html>
- For each screenshot implement the HTML codes to display the title, short description, and screenshot image.
Submission
- Create a folder named submit.
Delete the node_modules folder on any app that you are submitting.
-
Copy the Express-Static-App and app folders to the submit folder.
-
Create a zip file of the submit folder.
-
Navigate back to where the lab was originally downloaded, there should be a Submissions section (see below) where the zip file can be uploaded.