Lab-1-3
(2.5% of the course mark)
Express.js Routing and Middleware Lab
- In this lab, participants will delve into the world of web development with Express.js, a powerful and flexible web application framework for Node.js. Through hands-on exercises, learners will explore how to rapidly build robust and scalable web applications using Express.js. Topics covered include setting up a basic Express.js application, defining routes, handling HTTP requests and responses, and implementing middleware. Usage of nodemon is also covered.
Lab objectives
-
Understand the role and benefits of Express.js in web development.
-
Set up a basic Express.js application and configure middleware.
-
Define routes to handle different HTTP requests and responses.
-
Install nodemon as a development dependency.
Create an Express.js app
-
Open VSCode and create a folder named Express-Routing-Middleware-App.
-
Open the terminal and change the directory to Express-Routing-Middleware-App.
-
Initialize the app by running the following command:
npm init -y
- Install Express.js by running the following command:
npm install express
- Create a file named index.js and add the following code:
// Developer:
// Purpose:

const express = require("express");
const app = express();
const port = 3000;
const APP_NAME = "Express-App";

app.get("/", (req, res) => {
  res.send("Hello World");
});

app.listen(port, () => {
  console.log(`${APP_NAME} listening on port ${port}`);
});
-
Save the changes.
-
In the terminal, run the following command:
node index.js
-
Open your browser and navigate to: http://localhost:3000 and confirm that there is a text output.
-
Press
ctrl-cto terminate the app.
Ensure that the express app is working properly before continuing to the next step.
Add nodemon
- Install nodemon by running the following command:
npm install -D nodemon
- Configure package.json file by adding a new entry to scripts property.
"start": "nodemon index.js"
- In the terminal, run the following command:
npm run start
- Confirm that the terminal output is similar the following image:
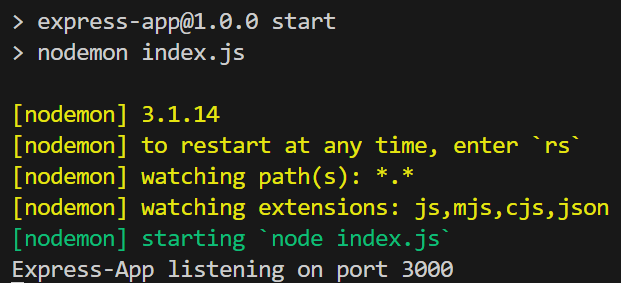
Nodemon restarts your app automatically when it detects file changes, which removes the need to manually stop and restart the server during development.
Add route parameter route
- Update index.js and add a new route with the following code:
app.get("/users/:id", (req, res) => {
  const { id } = req.params;
  res.send(`You sent this id: ${id}`);
});
-
Save the changes, since nodemon is installed your app should automatically restart.
-
Open your browser and navigate to: http://localhost:3000/users/1
-
Take a screenshot and save it as route-parameter.png.
Feel free to send different route parameter values.
Add query parameter route
- Update index.js and add a new route with the following code:
app.get("/products", (req, res) => {
  const { sort } = req.query;
  res.send(`You sent this sort: ${sort}`);
});
-
Save the changes, since nodemon is installed your app should automatically restart.
-
Open your browser and navigate to: http://localhost:3000/products?sort=desc
-
Take a screenshot and save it as route-query-string.png.
Add catch all route
- Update index.js and add a new route with the following code:
app.use("*catchAll", (req, res) => {
  res.status(404).send(`Request url: ${req.originalUrl} is not found.`);
});
-
Save the changes, since nodemon is installed your app should automatically restart.
-
Open your browser and navigate to: http://localhost:3000/url-that-does-not-exist
-
Take a screenshot and save it as route-catch-all.png.
Feel free to send different urls that does not exist.
Add express.json() and express.urlencoded() middlewares
-
express.json() - Parses incoming requests with a JSON body (Content-Type: application/json) and makes it available on req.body.
-
express.urlencoded() - Parses incoming requests with form data (Content-Type: application/x-www-form-urlencoded), like data submitted from an HTML <form>, and makes it available on req.body.
- Update index.js and add the following middlewares with the following code:
app.use(express.json());
app.use(express.urlencoded({ extended: true }));
Code that deals with middleware declarations should be placed near the top of the app, right before the route definitions.
- Update index.js and and add a new route with the following code:
app.post("/user", (req, res) => {
  const { firstName, lastName, email } = req.body;
  res.json({
    message: `Created user with the following values: ${firstName}, ${lastName}, ${email}`,
  });
});

app.post("/login", (req, res) => {
  const { userName, password } = req.body;
  let isCredentialValid = false;

  if (userName === "admin" && password === "123") {
    isCredentialValid = true;
  }

  res.send(`Username and Password Status: ${isCredentialValid}`);
});
These routes will demonstrate how express.json() and express.urlencoded() middlewares work.
-
Save the changes, since nodemon is installed your app should automatically restart.
-
Let us test express.json() by sending a POST request to the /user route.
-
Use Postman to send a POST request. Click on File > New... > HTTP.
-
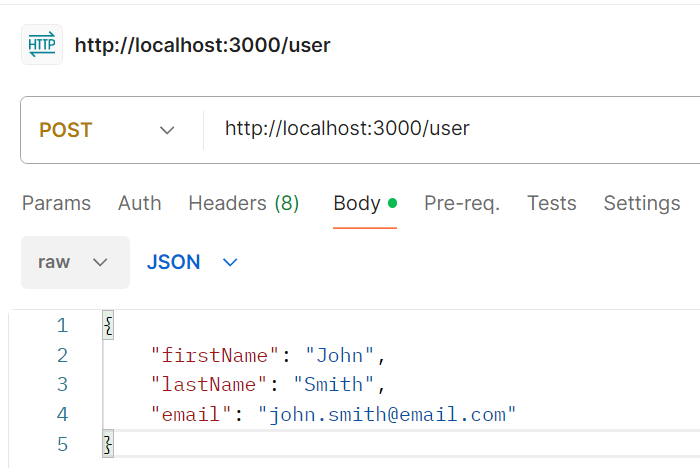
Choose POST as the HTTP method and enter http://localhost:3000/user in the url textbox.
-
Click on the Body tab, then choose raw and then JSON.
-
Enter the following json request:
{
  "firstName": "John",
  "lastName": "Smith",
  "email": "john.smith@email.com"
}
- Confirm that your Postman configuration is similar to the following image:
-
Click on Send and take a screenshot of the response and save it as postman-post-request.png.
-
Let us test express.urlencoded() by sending a POST request to the /login route.
-
Use an HTML form to send a POST request. Create a file named HTMLform.html and add the following code:
<!DOCTYPE html>
<html lang="en">
  <head>
    <meta charset="UTF-8" />
    <meta name="viewport" content="width=device-width, initial-scale=1.0" />
    <title>Login</title>
  </head>
  <body>
    <form action="http://localhost:3000/login" method="POST">
      <label for="userName">Username</label>
      <input
        id="userName"
        name="userName"
        type="text"
        placeholder="Enter username"
        required
      />

      <label for="password">Password</label>
      <input
        id="password"
        name="password"
        type="password"
        placeholder="Enter password"
        required
      />

      <button type="submit">Login</button>
    </form>
  </body>
</html>
-
Open the file HTMLform.html and enter admin as the username and 123 as the password. Click on Login to submit the form.
-
Take a screenshot of the browser output and save it as html-form-post-request.png.
Feel free to send different username and password values.
Add custom middleware
- Update index.js and add the custom middleware with the following code:
app.use(customMiddleware);
Code that deals with middleware declarations should be placed near the top of the app, right before the route definitions.
- Update index.js and add the custom middleware function at the bottom of the file:
function customMiddleware(req, res, next) {
  console.log(
    `[Type: Request] [Url: ${req.url}] [Method: ${req.method}] [User Agent: ${req.headers["user-agent"]}]`
  );

  // Listener which fires when the response is actually sent
  res.on("finish", () => {
    console.log(
      `[Type: Response] [Status Code: ${res.statusCode}] [Status Message: ${res.statusMessage}]`
    );
  });

  // Pass control to the next middleware
  next();
}
-
Save the changes, since nodemon is installed your app should automatically restart.
-
Retry some of the requests you have done on previously and pay attention to the terminal output, it should produce something similar to the following output:

- Take a screenshot of the terminal output and save it as custom-middleware.png.
Using sakura.css and normalize.css
-
Open VSCode and create a folder named app.
-
Download the files sakura.css and normalize.css and save them to the app folder. Make sure to rename them to sakura.css and normalize.css.
-
Copy route-parameter.png, route-query-string.png, route-catch-all.png, postman-post-request.png, html-form-post-request.png, and custom-middleware.png to the app folder.
-
In the app folder create a file named: lab-1-3.html and add the following HTML code below:
<!--
Developer:
Purpose:
-->

<!DOCTYPE html>
<html>
  <head>
    <meta charset="utf-8" />
    <meta name="viewport" content="width=device-width, initial-scale=1" />
    <!-- Update title -->
    <title></title>
    <!-- Reset styles using normalize -->
    <link rel="stylesheet" href="./normalize.css" />
    <!-- Classless css  -->
    <link rel="stylesheet" href="./sakura.css" />
  </head>
  <body>
    <!-- Enter the HTML codes to display the captured screenshots -->
  </body>
</html>
- For each screenshot implement the HTML codes to display the title, short description, and screenshot image.
Submission
- Create a folder named submit.
Delete the node_modules folder on any app that you are submitting.
-
Copy the Express-Routing-Middleware-App and app folders to the submit folder.
-
Create a zip file of the submit folder.
-
Navigate back to where the lab was originally downloaded, there should be a Submissions section (see below) where the zip file can be uploaded.